Master Poached Eggs: The Secret to Runny Yolks Every Time
The allure of a perfectly poached egg is undeniable. Imagine: a delicate, ethereal sphere with glistening, firm whites giving way to a rich, golden yolk that oozes luxuriantly with the slightest pierce of a fork. It’s the cornerstone of a classic Eggs Benedict, the crowning glory of avocado toast, and an elegant addition to salads and grain bowls. Yet, for many home cooks, the thought of tackling poached eggs can feel like a culinary tightrope walk – intimidating, fussy, and prone to disaster.
You’re not alone if you’ve faced the frustration of wispy whites, overcooked yolks, or eggs that stubbornly refuse to hold their shape. Recipes often overcomplicate the process, leading to the misconception that special gadgets or a chef's touch are essential. The truth? Mastering how to make poached eggs with those coveted runny yolks consistently is far simpler than you might think. With a few key techniques, a dash of patience, and a little practice, photo-worthy poached eggs are well within your reach.
This comprehensive guide will demystify the art of poaching, breaking down each step with actionable advice and expert insights. Say goodbye to culinary chaos and hello to perfect poached eggs, every single time.
What Exactly is a Poached Egg?
At its core, a poached egg is an egg that has been cooked without its shell by being gently submerged in simmering water until the whites are set and the yolk remains warm and liquid. Unlike frying, which uses oil and high heat, poaching relies on a delicate balance of water temperature and time to achieve its signature texture.
A truly perfect poached egg boasts several defining characteristics:
- Firm, Opaque Whites: The exterior should be completely set and brilliant white, holding the yolk in a neat, compact package. There should be no raw, translucent parts or "wisps" of white spreading into the water.
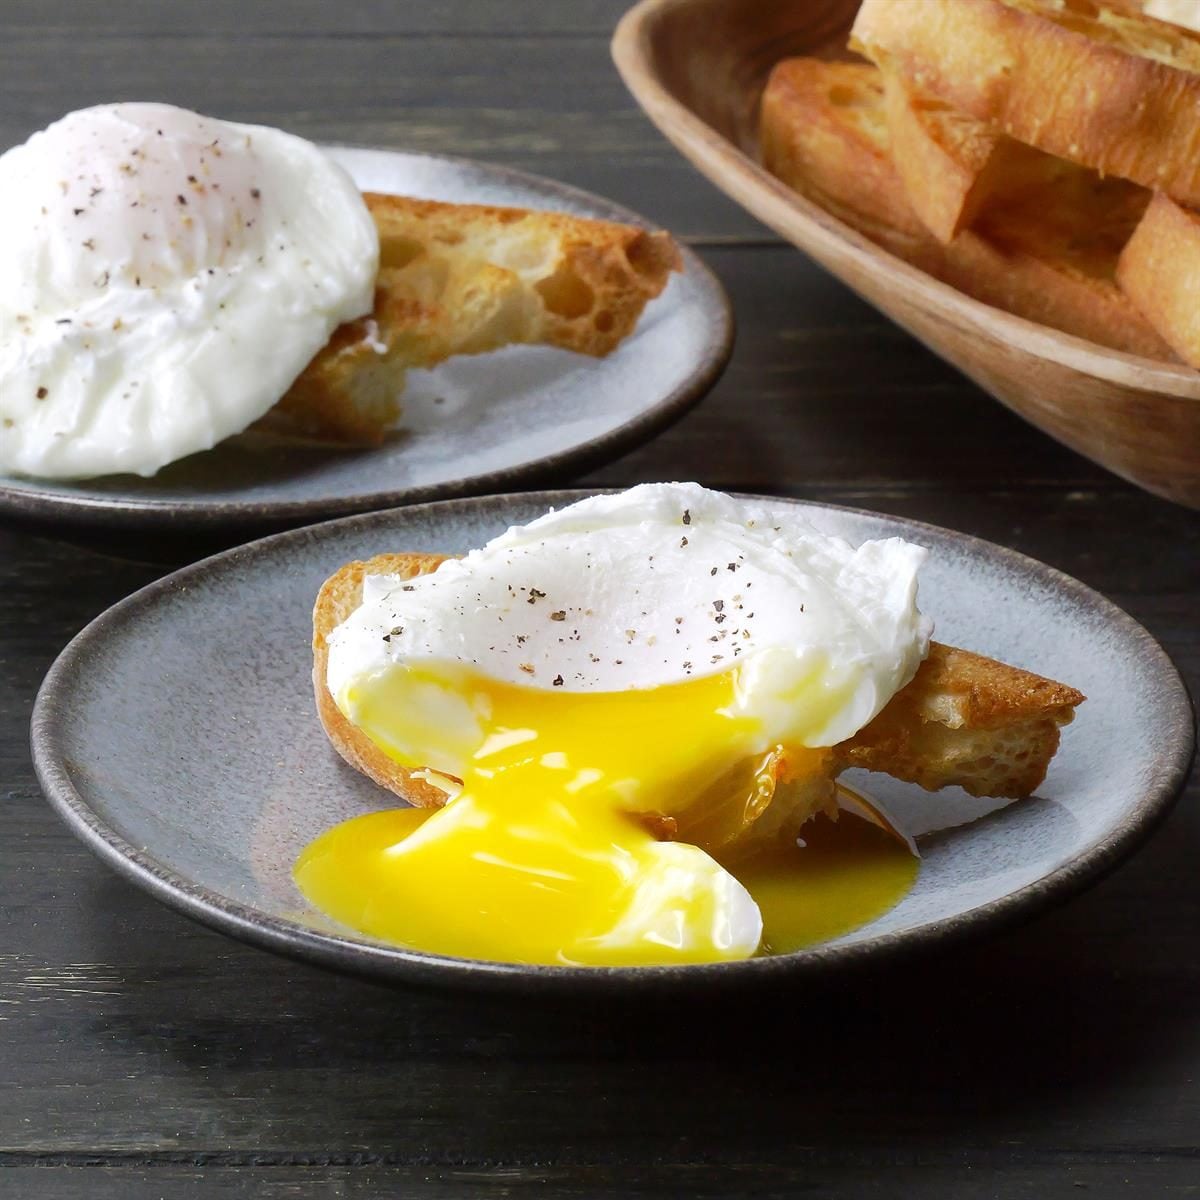
- Runny, Golden Yolk: This is the star of the show. Upon cutting into the egg, the yolk should flow out, creating a rich, creamy sauce that enhances whatever it accompanies.
- Delicate Texture: The entire egg should feel tender, not rubbery or tough, a testament to gentle cooking.
Understanding these benchmarks is the first step toward achieving poached egg perfection. It’s a culinary skill that speaks volumes about a cook’s attention to detail and precision, often considered a hallmark of a good chef.
The Essential Ingredients & Why They Matter
While the process of poaching an egg seems minimal, the quality and preparation of a few key ingredients make all the difference in achieving that flawless runny yolk and neat presentation.
Eggs: Freshness is Your Best Friend
The number one secret to well-shaped poached eggs without excessive "feathering" of the whites is using fresh eggs. As eggs age, their whites become thinner and more watery, causing them to spread out more readily when dropped into hot water. Fresh eggs, on the other hand, have thicker, more viscous whites that cling tightly to the yolk, resulting in a beautifully compact shape.
- How to Test for Freshness: Gently place an egg in a bowl of room-temperature water.
- If it lies horizontally on the bottom, it's very fresh.
- If it stands upright but still rests on the bottom, it's older but still perfectly usable for poaching (though it might spread a little more).
- If it floats to the surface, it's best to discard it.
- Room Temperature Eggs: For the most consistent cooking, allow your eggs to come to room temperature for 15-20 minutes before poaching. Cold eggs can lower the water temperature too much and cook unevenly.
White Vinegar: The Coagulation Catalyst
Don't be alarmed by the idea of adding vinegar; your eggs won't taste sour! A small splash of white vinegar in the poaching water is a game-changer. Vinegar helps the egg whites coagulate more quickly, setting their shape and preventing them from dispersing widely in the water. This is particularly helpful if your eggs aren't super fresh.
- Why White Vinegar? It’s crucial to use white vinegar (distilled white vinegar is ideal). Other vinegars, like apple cider or red wine vinegar, can discolor the delicate egg white, affecting the aesthetic appeal of your poached egg.
- How Much? Generally, about 1-2 teaspoons per liter of water is sufficient. Too much can make the whites tough.
Salt: For Flavor, Not Just an Afterthought
Adding a pinch of salt to the poaching liquid serves a simple but important purpose: it seasons the egg from the inside out, enhancing its natural flavor. While not critical for the structural integrity of the egg, it contributes to the overall deliciousness.
Water Temperature: The Goldilocks Zone
This is arguably the most critical factor for perfect poached eggs. The water should be simmering gently, not boiling vigorously. A rolling boil will agitate the eggs, causing them to break apart and creating tough whites.
- Ideal Temperature Range: Aim for water between 160°F and 180°F (71°C and 82°C). You'll see tiny bubbles forming at the bottom of the pan and steam rising, but the surface will be calm.
- The Right Pot: Use a large saucepan with at least 3-4 inches of water. This depth helps cushion the egg as it drops and provides enough volume to maintain a consistent temperature.
Step-by-Step Guide: How to Make Poached Eggs Perfectly Every Time
With your ingredients understood and ready, let's dive into the practical steps for achieving poached egg mastery.
- Simmer the Water: Fill your large saucepan with at least 3-4 inches of water. Bring it to a rolling boil over high heat, then immediately reduce the heat to a low simmer. The water should show small bubbles rising gently, with slight steam, but no aggressive bubbling. Add 1-2 teaspoons of white vinegar and a generous pinch of salt.
- Prep Your Eggs: Carefully crack each egg into its own individual small bowl, ramekin, or teacup. This makes it easier to gently slide the egg into the water and ensures no shell fragments accidentally join the party. Preparing them individually also allows you to add them one at a time for better control.
- Create a Gentle Whirlpool (Optional, but Recommended): Some chefs swear by creating a gentle whirlpool in the water just before adding the egg. Using a spoon, stir the water in a circular motion to create a vortex. This can help the egg whites wrap more tightly around the yolk as it descends.
- Poach the Eggs: Gently slide each prepped egg into the simmering water. If you're using the whirlpool method, drop the egg into the center of the swirl. Avoid overcrowding the pan; poach no more than 2-4 eggs at a time, depending on your pan size. This prevents the water temperature from dropping too drastically and allows each egg enough space to cook properly.
- Cook to Perfection: Let the eggs poach for 3 to 5 minutes.
- For very runny yolks: Aim for 3 minutes.
- For just set but still flowing yolks: 4 minutes is often ideal.
- For slightly firmer but still jammy yolks: Go for 5 minutes.
- Remove and Drain: Using a slotted spoon, carefully lift each poached egg from the water. Allow any excess water to drain off for a few seconds. For an even drier finish, you can briefly place the egg on a clean paper towel.
- Serve Immediately: Season with salt and freshly ground black pepper to taste.
Troubleshooting & Advanced Tips for Poached Egg Perfection
Common Poaching Pitfalls & Solutions
- Wispy Whites: This is often due to older eggs (use fresher ones!) or water that's too hot and boiling too vigorously. Ensure your water is at a gentle simmer and add a bit more vinegar.
- Yolk Too Hard: Overcooking is the culprit. Reduce your poaching time or ensure your water isn't too hot.
- Eggs Sticking to the Pan: A non-stick pan helps, but ensuring enough water depth and not letting the eggs sit untouched at the bottom for too long can prevent this. A gentle nudge with your slotted spoon after about 30 seconds can also help.
The Make-Ahead Poached Egg
If you're hosting brunch or simply want to streamline your morning routine, poached eggs can absolutely be made in advance! This technique is a lifesaver for effortless entertaining.
- Partial Poach: Poach eggs for 2-3 minutes, so the whites are set but the yolk is still very runny.
- Ice Bath: Immediately transfer the partially cooked eggs to an ice bath to stop the cooking process. Once completely cooled, store them in the cold water in an airtight container in the refrigerator for up to 2-3 days.
- Reheating: To serve, gently place the cold poached eggs into a pan of simmering (not boiling) hot water for 60-90 seconds, just until warmed through and the yolks are perfectly runny. This method is explored further in our guide to No More Fussy Poached Eggs: Simple Steps for Perfect Brunch.
Beyond Benedict: Creative Serving Suggestions
While Eggs Benedict is iconic, poached eggs are incredibly versatile:
- Avocado Toast: A classic pairing, adding richness and protein.
- Salads: A warm poached egg can elevate a simple green salad or a heartier Niçoise.
- Grain Bowls: Top quinoa, farro, or rice bowls with a poached egg for a satisfying meal.
- Ramen & Soups: Adds depth and creaminess to Asian-inspired broths.
- Steak & Asparagus: A fancy touch for a luxurious meal.
Remember, like any culinary skill, practice makes perfect. Don't be discouraged by your first few attempts. Each egg you poach offers an opportunity to learn and refine your technique. Pay attention to the water temperature, the freshness of your eggs, and the timing, and soon you'll be consistently turning out perfect poached eggs with beautiful, runny yolks.
Mastering poached eggs is a truly rewarding kitchen achievement. It transforms a simple ingredient into something truly special, adding a touch of elegance and gourmet flair to any meal. By following these detailed steps and understanding the science behind each element, you now have the tools to achieve that elusive, perfectly runny yolk every time. So go ahead, crack those eggs, fill that pan, and impress yourself and your guests with your newfound poaching prowess!
